


What Does the Deck Building Process Look Like From Planning to Final Construction?

If you have been thinking about adding a deck to your Shelter Island home, you probably have a picture in your mind of the finished result. The sun-soaked boards, the waterfront views, the outdoor dining space where friends and family gather on warm summer evenings. That vision is absolutely achievable, but getting from idea to reality involves a clear, step-by-step process that many homeowners have never seen up close before.
Understanding what goes into building a deck is not just satisfying to know. It actually helps you become a better partner in your own project. When you understand each phase of the build, you can ask better questions, set realistic expectations, and make informed decisions that shape the outcome. At Bartilucci Construction, we believe that an informed homeowner is the best kind of homeowner, and we walk every client through the process from the very first conversation to the final walk-through.
In this guide, we are breaking down the complete deck-building journey in plain, simple terms. Whether you are building your first deck or replacing an existing one on your Shelter Island property, this guide gives you a clear picture of what to expect every step of the way.
The Initial Consultation and Property Assessment
Every deck project begins with a conversation. Before any plans are drawn or materials are ordered, a professional builder needs to visit your property and understand both your goals and the physical realities of your site. This is the initial consultation, and it is one of the most important parts of the entire process.
During this visit, your builder will evaluate the layout of your property, the condition of your home's existing structure, the slope and soil conditions of your yard, and any site-specific challenges that need to be addressed before construction begins. For coastal properties on Shelter Island, this assessment also includes evaluating exposure to salt air, wind direction, proximity to the water, and any shoreline or wetland regulations that may affect what can be built and where.
This is also the stage where you share your vision. How do you want to use the deck? How large do you want it to be? Do you want built-in features like seating, lighting, or a pergola? What is your budget? The answers to these questions help your builder shape a proposal that is both responsive to your wishes and grounded in what is practical for your specific site.
1:Design and Planning
Once the initial consultation is complete and your builder has a clear understanding of your property and your goals, the design phase begins. This is where your vision starts to take a more concrete shape on paper.
A well-designed deck is not just about size and shape. It involves thoughtful decisions about elevation, orientation, traffic flow, structural support requirements, and how the deck connects to your home's existing architecture. For Shelter Island homes, orientation matters a great deal because you want to maximize views and natural light while considering how wind and weather move across your specific property.
How Design Decisions Affect the Final Build
Design choices made at this stage have real consequences for cost, timeline, and long-term performance. A deck that is elevated several feet off the ground, for example, requires more substantial structural framing and more complex foundation work than a ground-level platform. A deck with multiple levels, built-in seating, and integrated lighting involves more labor and material than a straightforward single-level surface.
Getting the design right at this stage, before any physical work begins, is where working with an experienced local builder pays dividends. Changes made on paper cost nothing. Changes made after framing has begun cost significantly more in both time and money.
Material Selection During the Design Phase
Material selection is typically finalized during the design phase rather than after, because the choice of decking material affects structural spacing requirements, fastener types, framing dimensions, and other technical details that need to be incorporated into the plans. This is where you will choose between options like composite decking, tropical hardwoods, pressure-treated lumber, PVC, and other products suited for coastal conditions. For a full breakdown of each material and how it performs near salt water, our guide on the best decking materials for coastal homes in Shelter Island covers this topic in depth.
2:Permits and Regulatory Approvals
Once your design is finalized, the next step before any construction can legally begin is obtaining the proper permits and approvals from your local building authority. This step is often underestimated by homeowners who are eager to get started, but it is a critical and non-negotiable part of the process.
On Shelter Island, deck construction is subject to local building codes, zoning regulations, and, in many cases, additional environmental review requirements due to the proximity to water and protected natural areas. Any deck that is attached to a home, elevated above a certain height, or located within a specified distance from the waterline will typically require a building permit at a minimum.
What the Permitting Process Involves
The permitting process generally involves submitting your design plans to the local building department, along with supporting documentation about the materials and structural specifications of the build. A plan examiner reviews the submission to confirm that the proposed structure meets all applicable safety codes and zoning requirements. In some cases, revisions may be requested before approval is granted.
The timeline for permit approval varies. Simple projects in periods of low demand may be approved within a few weeks. More complex projects or those subject to environmental review can take longer. A builder familiar with Shelter Island's local permitting process can prepare your submission accurately the first time and track its progress, minimizing unnecessary delays.
Skipping permits is never a wise choice. Unpermitted decks can create serious problems when you try to sell your home, trigger fines from local authorities, and in the worst cases, require demolition and rebuilding at the homeowner's expense.
3:Site Preparation
With permits in hand, the physical work can finally begin. The first stage of construction is site preparation, which involves clearing and leveling the area where your deck will be built, marking out the footprint of the structure, and preparing for the foundation work that follows.

Site preparation for a coastal property on Shelter Island may also include addressing drainage considerations, protecting surrounding vegetation or sensitive natural areas, and ensuring that the work zone is set up safely and efficiently. This phase sets the stage for everything that follows, and doing it carefully makes every subsequent step go more smoothly.
4: Foundation and Footings
The foundation of your deck is what keeps the entire structure stable, level, and safe over its entire lifespan. This is not a step where corners can be cut, particularly in a coastal environment where soil conditions and moisture levels can change significantly between seasons.
Deck footings are typically concrete piers that are poured into holes dug below the frost line. The frost line is the depth at which the ground freezes during winter, and setting footings below this depth prevents the structure from heaving and shifting as the ground freezes and thaws each year. In New York's climate, this is a particularly important requirement.
Why Coastal Foundations Require Extra Attention
For waterfront properties on Shelter Island, foundation work may involve additional considerations such as soil bearing capacity near the water, the potential for erosion over time, and, in some cases, elevated foundation requirements to meet flood zone regulations. These are not complications that a general contractor unfamiliar with coastal construction will necessarily anticipate. An experienced local builder who understands the specific soil and environmental conditions of Shelter Island will approach footing placement and depth with the knowledge that these coastal factors demand.
Post bases and anchor hardware used at this stage must also be rated for coastal environments, as standard hardware corrodes quickly in salt air. Stainless steel or hot-dipped galvanized anchors are typically required to ensure that the connection between the concrete footings and the deck's structural posts remains sound for decades.
5: Structural Framing
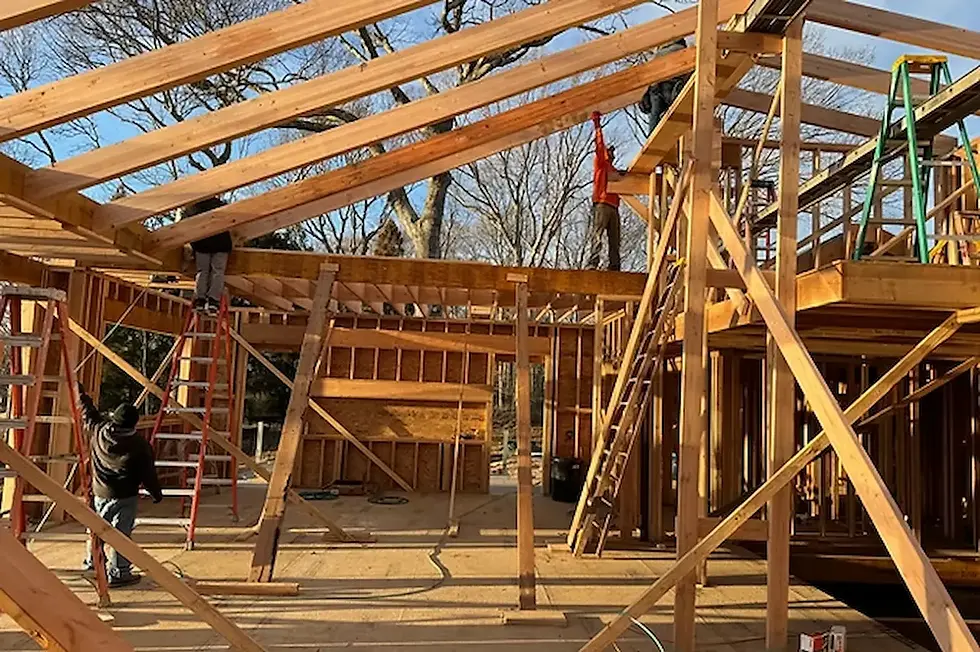
With the footings set and cured, the structural framing phase begins. This is the stage where the skeleton of your deck takes shape. Framing involves installing the posts, beams, and joists that form the support structure for the decking surface above.

The size and spacing of framing members are determined by the design plans and must comply with the structural requirements outlined in the building code. Larger decks, elevated platforms, and designs intended to support heavy loads like outdoor kitchens or hot tubs require heavier framing than smaller, ground-level structures.
In coastal builds, framing lumber is typically pressure-treated to resist moisture and insect damage over the long term. The connections between framing members are made with corrosion-resistant hardware, and joist hangers, post caps, and beam brackets are all specified for outdoor or coastal use. Proper framing is what allows a deck to carry its intended load safely and remain structurally sound through years of weather exposure.
6: Installing the Decking Surface
Once the structural frame is complete and inspected, the decking surface can be installed. This is the part of the build that most homeowners have been waiting to see take shape, and it is where the visual character of your outdoor space really begins to emerge.

Decking boards are installed perpendicular or sometimes at an angle to the joists below, depending on the design. Spacing between boards is carefully managed to allow for drainage and air circulation while also accounting for the natural expansion and contraction that occurs with temperature and moisture changes. Boards are fastened either from above with screws or from the sides using hidden fastener systems, which provide a cleaner finished appearance with no visible hardware on the surface.
The pattern and direction of the decking boards can have a significant effect on the overall aesthetic of the finished deck. Your builder will work with you during the design phase to finalize these details, but it is worth knowing that the installation technique can vary meaningfully between different material types. Composite and PVC boards, for example, often use proprietary hidden fastener systems designed specifically for that product, while hardwoods may require pre-drilling and careful board selection to manage grain direction and natural variation.
7: Stairs, Railings, and Built-In Features
With the main decking surface in place, attention turns to the finishing elements that complete the structure and bring the design to life. Stairs, railings, and any built-in features like benches, planters, lighting, or pergola structures are installed during this phase.
Stair Construction
Stairs connect your deck to the ground, to other levels of the structure, or to access points on the waterfront side of the property. Stair construction involves precise measurement and layout to ensure that every step has consistent rise and run dimensions, which is both a safety requirement and a matter of comfort. Stairs also need to be designed and framed to handle the load of regular foot traffic and weather exposure over time.
Railing Installation
Railings are required on any deck surface elevated more than a specified height above grade, and they play a critical safety role for children, elderly family members, and guests. Beyond safety, railings are a major design element that shapes the visual character of your outdoor space. Options range from traditional wood balusters to aluminum, glass panel, and cable railing systems, each offering a different aesthetic and level of maintenance.
For coastal properties on Shelter Island, railing materials and hardware need to be chosen with the same level of care as decking materials. Cable and stainless steel systems are popular for waterfront applications because they are highly resistant to corrosion and they preserve sightlines to the water. Glass panels are another option that maximizes views while providing a windbreak. Whatever system you choose, all hardware and fasteners should be rated for marine or coastal environments.
8: Inspections and Code Compliance Verification
Once the structural work is complete and the finishing elements are in place, your deck is subject to one or more inspections by the local building authority. These inspections verify that the completed structure matches the approved plans and meets all applicable safety codes and standards.
Inspections are a normal and necessary part of any permitted construction project. A thorough final inspection protects you as the homeowner by confirming that your deck has been built to code and is safe for use. It also creates an official record of compliance that is valuable if you ever sell your home or make a future insurance claim.
An experienced builder will schedule inspections at the appropriate stages of the project and will have the documentation and workmanship in place to pass without issues. If any corrections are noted during an inspection, they are addressed before the project moves forward to the next phase or closes out.
9: Final Walk-Through and Project Completion
The last step in the deck building process is the final walk-through, where your builder takes you through the completed project from top to bottom. This is your opportunity to review every element of the finished deck against the original design and your expectations, ask any questions about care and maintenance, and confirm that everything has been completed to your satisfaction.
A good builder will take this walk-through seriously and will be prepared to address any remaining touch-ups or adjustments before officially closing out the project. At Bartilucci Construction, the final walk-through is something we treat as a genuine milestone. It is the moment where your vision has become reality, and we want to make sure that the finished product is everything you hoped it would be.
After the walk-through, your builder should provide you with any relevant documentation, including permit close-out paperwork, material warranties, and care and maintenance guidelines for your specific decking products. Knowing how to care for your new deck properly from day one is the best foundation for a long and trouble-free lifespan, a topic we explore in detail in our upcoming guide on the most common deck maintenance mistakes homeowners make in coastal climates.
Conclusion
The deck building process is a journey with many carefully sequenced steps, each of which contributes to the quality and longevity of the finished structure. From the first consultation and property assessment through design, permitting, foundation work, framing, surface installation, and final inspection, every phase has a purpose and a direct impact on the outcome.
For homeowners on Shelter Island, this process is shaped by the unique demands of coastal construction, from the materials and hardware required to withstand salt air to the local regulatory requirements that govern building near the water. Working with a builder who knows this environment inside and out makes every phase of the process smoother, more accurate, and more likely to produce a result you will enjoy for many years to come.
If you are ready to start planning your deck project, Bartilucci Construction is here to guide you from the very first conversation all the way to the final walk-through. Contact us today to schedule your consultation and take the first step toward your dream outdoor space on Shelter Island.
Frequently Asked Questions (FAQs)
How long does the deck-building process take from start to finish?
The total timeline for a deck project depends on the size and complexity of the design, the permitting process in your area, material lead times, and weather conditions during construction. A straightforward deck build on Shelter Island might take four to eight weeks from permit approval to final inspection. Larger or more complex projects with custom features can take longer. Your builder should be able to give you a realistic project timeline during the design phase once the full scope of work is defined.
When is the best time of year to build a deck on Shelter Island?
Late spring through early fall is generally the most favorable window for deck construction in the Shelter Island area, as warm, dry weather supports concrete curing, framing work, and surface installation. That said, many builders begin planning and permitting work over the winter months so that construction can begin as early as possible in the spring. Starting your planning process in the fall or winter is a smart way to position your project for a smooth spring build.
Do I need to be home during the deck construction process?
You do not need to be present on-site every day during construction, but it is helpful to be reachable by phone and available for brief check-ins at key decision points. Your builder should keep you informed of progress and flag any issues or choices that require your input as they arise. A pre-construction meeting at the start of the project is a good opportunity to establish communication expectations and agree on how updates will be shared.
What happens if the design needs to change after permits are approved?
Changes to the permitted design after approval are possible but do require a revised permit submission, which adds time to the project. This is one of the strongest reasons to invest care and attention in the design phase before permits are filed. Major changes to size, elevation, or structural configuration are significantly easier and less costly to address on paper than after approval or construction has begun.
How are deck footings different for coastal properties?
Coastal deck footings face challenges that inland footings do not, including higher soil moisture levels, potential for erosion near the water, flood zone requirements, and in some cases, different bearing capacity in sandy or wet soils. Footings for coastal builds are often required to be deeper or larger in diameter than standard interior builds, and all hardware used at the footing connection points must be rated for corrosion resistance. A builder with specific coastal construction experience will approach this phase with the extra diligence it requires.
What is the difference between a deck inspection and a final walkthrough?
A deck inspection is an official review conducted by the local building authority to verify that the structure meets the approved plans and applicable building codes. It is a regulatory requirement for any permitted construction. A final walkthrough, on the other hand, is a review conducted between you and your builder to confirm that the project meets your expectations and that all agreed-upon work has been completed to a satisfactory standard. Both are important parts of a well-managed project.
Can I add features like outdoor lighting or a pergola after the deck is already built?
Yes, features like lighting, pergola structures, built-in seating, and outdoor kitchen components can often be added after a deck is built, though it is generally more cost-effective and seamless to incorporate them during the original construction. Adding features later may require additional permits depending on the scope of work and may involve more complex retrofitting than if they had been planned from the beginning. If you are considering future additions, mention them during the design phase so your builder can plan the structural and electrical rough-in work accordingly.


Comments